Proper drainage is the unsung hero of any block paving project. It keeps your driveway or patio looking pristine, avoiding water damage and unsightly puddles. Installing block paving drainage isn’t just a good idea; it’s essential to maintaining the integrity and aesthetics of your paved area.
They’ll dive into the steps required to ensure efficient water runoff, from choosing the right materials to the final touches that make all the difference. Whether you’re a DIY enthusiast or planning to supervise, understanding the process is key to a successful installation.
The Importance of Block Paving Drainage
Effective drainage is pivotal to the longevity and functionality of block paved surfaces. Without it, homeowners face many problems that can undermine the whole installation. Standing water is unsightly and poses risks of slip hazards, especially during winter when it can freeze. Furthermore, the water concentration on the surface accelerates the deterioration of paving materials, leading to cracks or sinkholes that can result in expensive repairs.
Waterlogged paving is a breeding ground for algae and moss, which can cause the blocks to become slippery and detract from the area’s visual appeal. Additionally, poor drainage can lead to sub-base erosion beneath the blocks, affecting the stability and level of the laid paving. It’s crucial to incorporate an effective drainage system from the planning stage to prevent such issues.
Regulations in many areas stipulate that proper drainage must be included in paving projects to manage surface water responsibly. This reduces the impact of urban runoff on the local drainage infrastructure and mitigates the risk of flooding. Sufficient drainage channels water away from the property and into appropriate storm drains or sustainable drainage systems (SuDS), thus protecting the environment.
Selecting the correct gradient for the paved area ensures water flows away from buildings and into the designated drainage. A slight incline, usually between 1 in 80 and 1 in 60, allows gravity to pull water towards the drainage channels or soakaways. This gradient must be consistent to prevent pooling in low spots.
Incorporating adequate drainage into block paving not only fulfils legal obligations but also safeguards the investment in the property. Ensuring a well-drained surface extends the life of the paving, maintains aesthetic value, and provides a safe, functional area for years to come. Therefore, understanding drainage’s critical role is vital when planning and executing a block paving project.
Choosing the Right Materials for Drainage
When selecting materials for drainage in block paving, durability, permeability, and regulatory compliance are paramount. Homeowners and contractors should consider not only the aesthetics of the paving blocks but also the functional characteristics of the underlying drainage materials.
Permeable pavers are popular. They let water seep through the surface and reduce runoff. They come in various materials, such as concrete, clay, and stone. The permeability rate of these pavers should align with the expected rainfall intensity in the area. Additionally, aggregate materials used beneath the pavers play a crucial role. Crushed stone or gravel with varying sizes allows for better water infiltration, creating an efficient sub-base layer that supports drainage.
This is one of the biggest disadvantages of block paving since it is only partially permeable; permeable paving variant or resin bounded surfacing, is the better solution for draining water naturally down through the surface. Here is a breakdown of resin vs block paving to give you some insight into the differences between the two surfaces.
The correct selection of geotextile membranes is also essential. These membranes act as filters, preventing the subbase from mixing with the soil beneath while allowing water to drain through. They help maintain the pavement’s structural integrity and prevent soil particles from clogging the aggregate layers.
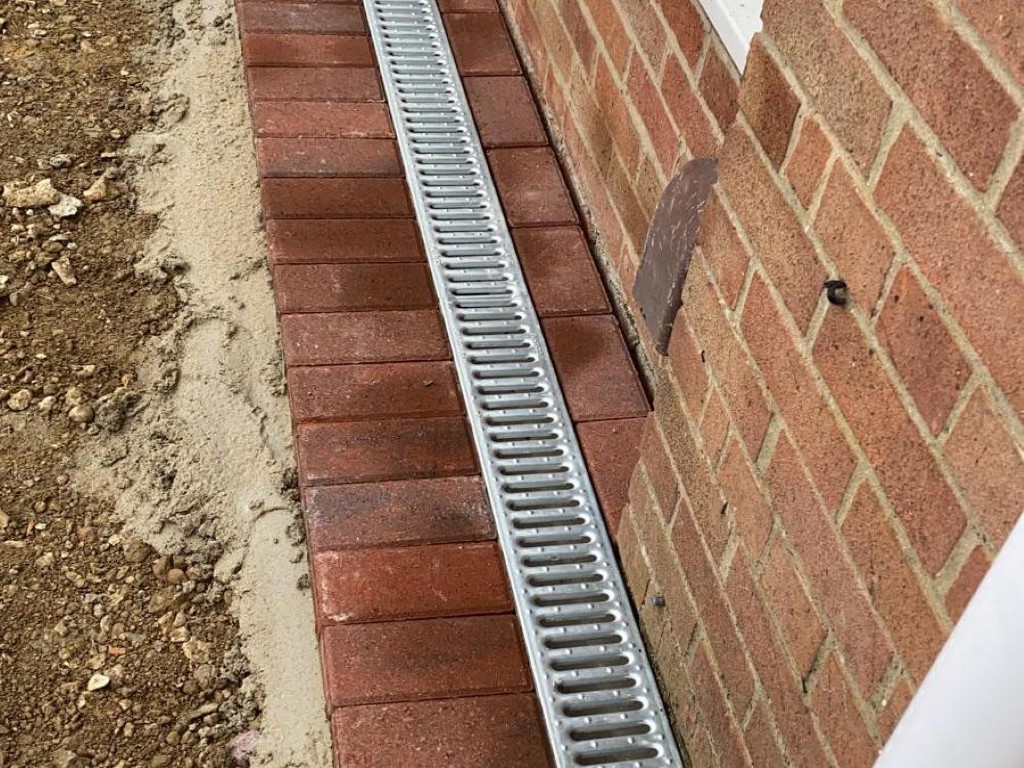
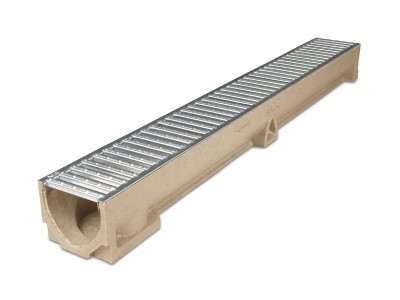
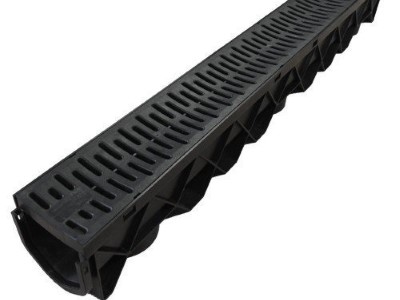
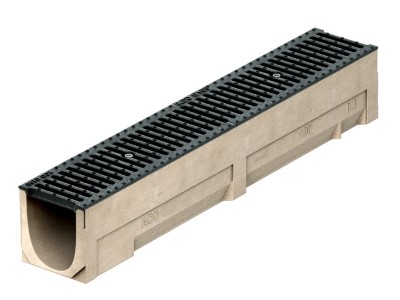
Installed drainage systems such as channel or French drains might be necessary for areas with heavier precipitation. Channel drains, made of durable concrete or plastic, should be strategically placed to intercept water flow. On the other hand, French drains rely on a trench filled with gravel or rock and contain a perforated pipe that redirects water away from the paved area.
| Material Type | Function | Application |
|---|---|---|
| Permeable pavers | Water infiltration | Surface layer |
| Crushed stone | Water filtration | Sub-base layer |
| Geotextile membrane | Filtration | Between sub-base and soil |
| Channel drains | Water interception | Along pavement edges |
| French drains | Water redirection | Below surface |
Considering local climate and site-specific conditions can further refine material choices. Waterproofing compounds and edge restraints, for example, can also contribute to the overall effectiveness of the drainage installation. Opting for materials that are easy to install and maintain while meeting performance expectations will ensure a well-functioning drainage system for block paving.
Preparing the Area for Drainage Installation
Site preparation is a crucial first step before the installation of drainage systems in block paving projects gets underway. This ensures the area is primed for the efficient installation of the chosen drainage materials and systems. It’s not just about digging a few holes; it’s a systematic process that begins with thoroughly assessing the existing conditions.
The site assessment should involve surveying the land to understand the natural water flow and identify potential issues. The slope of the terrain must be considered because it dictates how and where water will naturally accumulate. Moreover, if there are any existing structures or utilities, they must be located and marked to avoid damaging them during the installation process.
Once the assessment is complete, excavating the base layer is the next step in preparing the area. This involves removing the top layer of soil to create a stable foundation for the pavers and drainage system. The excavation depth depends on several factors, including soil type, expected load on the surface, and the type of drainage being installed.
Here are a few key considerations during excavation:
- Remove organic materials such as grass and roots as they can decompose and cause instability.
- Flatten and compact the exposed ground to prevent future settlement.
- Ensure the base is sloped towards the drainage point to facilitate water flow.
After the site is prepared, a geotextile membrane may be recommended. This helps prevent soil erosion and maintains the integrity of the aggregate layer, which is essential for effective drainage.
Next, an appropriate aggregate base is laid down. This layer serves multiple purposes: it supports the pavers, facilitates water filtration, and optimises drainage systems. The aggregate should be compacted in layers to enhance stability and prevent future shifting.
Throughout the process, adhering to local building regulations and ensuring all measures meet those standards is fundamental. By following these preparatory steps diligently, paving professionals set the stage for a robust drainage system that stands the test of time and weather.
Installing the Drainage System
Once the site preparation is complete and the base layer is in place, installing the drainage system is the next critical step. This is a crucial aspect of block paving that ensures longevity and functionality of the paved area. Proper drainage helps avoid water pooling and damage due to freeze-thaw cycles and other weather-related issues.
Laying the Pipes
Firstly, perforated drainage pipes are laid at the lowest point of the slope. They must be carefully positioned to capture and redirect water away from the paving. Pipes should be surrounded with gravel to enhance water flow and protect them from the weight of the overlying materials.
Incorporating Inspection Chambers
Incorporating inspection chambers at strategic points is essential to provide access for potential blockage clearance and maintenance. This is especially important in areas susceptible to accumulating debris that could obstruct the drainage flow.
Creating Surface Drainage
Surface drainage solutions like channel drains should be installed at the pavement edges or where there’s a risk of water accumulation. Channel drains filter water away from the surface and into the underground drainage system, offering an extra layer of protection against water damage.
Connection to Soakaways or Existing Drainage
The drainage system must be connected to either a soakaway or an existing drainage network, ensuring the water is disposed of legally and safely. A soakaway is a pit filled with rubble that allows water to slowly seep away, reducing the risk of overloaded systems or flooding. If connecting to a pre-existing drainage system, it’s vital to ensure compatibility and secure connections to prevent leaks.
Testing the System
Finally, the system should be thoroughly tested by flushing water to identify potential issues. Adjustments might be necessary to make sure the system operates efficiently. Only after a successful test should the block paving process commence, knowing the groundwork for an effective drainage system has been properly laid.
Adding the Final Touches
Once the drainage system is in place and tested, the next pivotal phase includes adding final touches to ensure the longevity and aesthetics of the block paving. Starting with geotextile fabric, this layer acts as a barrier to prevent weed growth. Also, it aids in maintaining the base integrity by separating the sub-base from the bedding layer.
They’ll then lay the bedding layer, typically consisting of sharp sand. This layer must be compacted and screeded to create a flat and even surface for the blocks. Consistency in the bedding layer thickness is crucial to avoid any future displacement or settling of the blocks.
Laying the Blocks
- Dry lay the blocks first to check for fit and pattern.
- Cut blocks as required for edges and obstacles, ensuring tight and accurate fit.
- Place the blocks gently onto the bedding layer, maintaining the designed pattern and spacing.
- Use a rubber mallet to tamp the blocks into the sand, verifying their level with existing pavement or features.
Jointing and Sealing
After blocks are positioned, joint filling, often using kiln-dried sand, comes into play. This sand should be brushed into the joints and compacted with a plate compactor. The process might need repeating to ensure all joints are full, which will stabilise the blocks and prevent movement.
As a preventive measure, sealant can be applied to protect against staining and enhance colour. They should choose a sealant compatible with the block material and local climate conditions. Sealant application keeps the blocks looking new and can make future maintenance and cleaning easier.
Maintenance Tips
Lastly, maintenance tips can’t be overlooked in the process. It’s recommended to clean the paving regularly, replace joint sand as needed, and watch out for signs of drainage issues. Quick response to any emerging problems will safeguard the integrity of the block paving and the effectiveness of the drainage system beneath it.
Conclusion
Proper drainage is key to ensuring the longevity and aesthetic appeal of block paving. Following the outlined steps, homeowners can confidently install an effective drainage system. Regular maintenance will keep the paving pristine and functioning well, preventing water accumulation and related issues.
Armed with these insights, tackling a block paving drainage project should now seem less daunting and more like a rewarding DIY endeavour. Remember, a well-executed drainage system not only adds value to your property but also saves you from potential headaches in the future.


